


.png)
As a preamble, it seemed important to differentiate between camping and bivouacking, and then to develop the equipment you need for bivouacking and the tips that can be very useful in preparing for it!
BIVOUAC OR CAMPING: WHAT IS THE REAL DIFFERENCE?
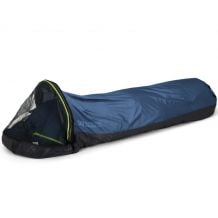
CHOOSING SHELTER FOR YOUR BIVOUACS BASED ON YOUR NEEDS
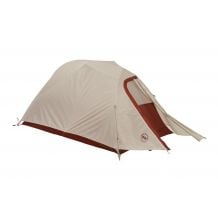
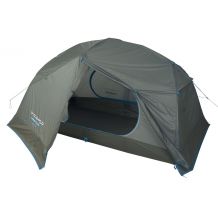
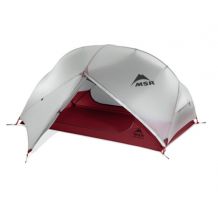
One of the first elements to consider is shelter. Depending on your preferences and experience, you can opt for a lightweight hiking tent, a tarp, or a bivy bag. The trekking tent remains the most comfortable and protective solution, ideal in case of wind or rain. Set up every evening and packed away every morning, it should be both lightweight and easy to install. There's no need to turn every end of the day into a headache: choose a tent that is easy to handle, as it will accompany you throughout your hike, strapped to your back. The lightness of the gear is therefore an essential criterion to maintain your walking comfort.
We recommend choosing a freestanding tent that can stand alone without guying, which makes last-minute location changes easier. In terms of durability, prioritize a ground waterproof rating of at least 1,500 Schmerber to calmly face sudden rains or nighttime storms.
The tarp, more minimalist, appeals to experienced hikers looking for lightness. Unlike a tent, it has no poles or integrated floor, making it a particularly compact and ultralight solution. But this weight saving requires good installation sense and a choice adapted to one's needs. To choose your tarp well, it is essential to consider the area it covers, its weight, its water resistance, and its ease of setup. A model of about 2.5 x 3 meters offers adequate protection for one person with their backpack, or even two in a tight configuration. Check the waterproof rating of the fabric (at least 2,000 Schmerber) and ensure it has enough anchor points to allow for different configurations, depending on the wind or rain. A tarp ideally combines with a mosquito net or a bivy bag to protect against insects and ground moisture. In summary, the tarp is an ideal solution for those who want to travel light, provided they master some basic setup techniques and adapt their choice to the planned bivouac conditions. The tarp is increasingly appealing to light bivouac enthusiasts and seasoned hikers.
The bivy bag, for its part, is an ultra-compact solution, often used by solo adventurers, particularly favored by hikers seeking lightness and discretion. This minimalist shelter system slips directly around the sleeping bag and offers protection against moisture, wind, and sometimes even insects, depending on the models. To choose your bivy bag well, start by defining the use you will make of it: some simple models serve only as an overbag to improve insulation and moisture resistance, while others are true waterproof shelters, equipped with a hood and an integrated mosquito net. Pay attention to the breathability of the fabric, a key criterion to avoid condensation inside, especially in cold or humid conditions. A good bivy bag should also offer sufficient waterproofing (at least 10,000 Schmerber for real protection) while remaining light enough not to weigh down your pack. Finally, check the dimensions: a model that is too narrow can be uncomfortable, especially if you sleep with your backpack. The bivy bag is ideal for solitary adventurers, self-sufficient treks, or outings in challenging conditions where every gram counts.
Whatever your choice, the shelter should be quick to set up and capable of protecting you from the elements. Find all our ultralight tents.
-> To learn more: How to choose your tent for camping and bivouacking?
.png)
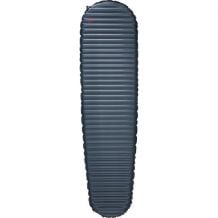
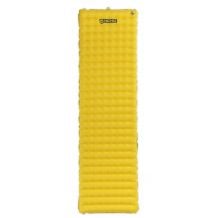
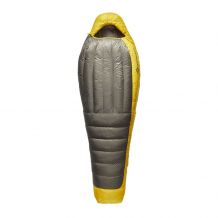
THE SLEEPING SYSTEM FOR A GREAT NIGHT
- R < 1: summer use only
- R between 1 and 2: suitable for spring and autumn
- R between 2 and 3: good for three seasons (spring, summer, autumn)
- R > 3: usable all year round, even in winter
-> To learn more: How to choose your sleeping bag?
THE HIKING BACKPACK: YOUR ADVENTURE COMPANION
The hiking backpack must be spacious enough to hold all your equipment, but also well-designed to distribute the load. The backpack is undoubtedly the most essential element of your bivouac equipment, as it will carry everything else. Choosing the right model ensures both comfort on the trails and practicality at the campsite. The first thing to consider is the volume. For a one or two-night bivouac, a 40 to 50-liter pack is generally sufficient. Beyond that, for longer treks or complete autonomy, a volume of 50 to 70 liters may be necessary. Prefer a pack well adjusted to your body shape, with a good carrying system: padded shoulder straps, an effective hip belt, and a ventilated back are essential elements to limit fatigue and pain. Accessibility to the contents is also an important criterion: side pockets, separate compartments, or front openings can greatly facilitate organization. Finally, consider the empty weight of the pack: a model that is too heavy from the start can quickly become a burden. In summary, the right bivouac backpack is one that combines ergonomics, lightness, appropriate capacity, and durability: so that carrying your gear remains a pleasure, even after several hours of walking. It is important to organize your belongings intelligently, keeping the essentials within easy reach.
-> To learn more: Buying guide: how to choose your backpack for a multi-day hike? Our top 5 trekking backpacks
.png)
LIST OF EQUIPMENT TO HAVE IN YOUR BACKPACK FOR BIVOUACKING
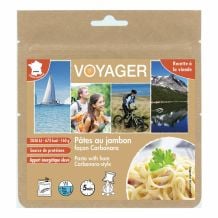
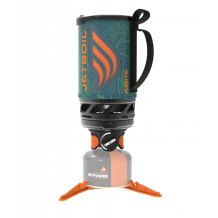
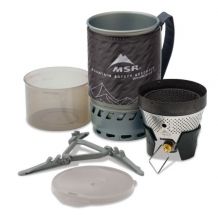
For meals while bivouacking
Hydration while bivouacking
Water filters allow you to consume water almost instantly, which is a definite advantage when on the move. Tablets, on the other hand, require a waiting time of 30 minutes to 2 hours depending on the product, but can be used alone or in conjunction with a filter for double safety. If you opt for a filter, you will have a choice between different formats: pump filters, gravity filters, filtering straws, bottles with integrated filters, or even UV purifiers. Each has its advantages depending on duration, number of people, and type of terrain. The essential thing is to choose a system adapted to your needs and reliable enough to ensure your water remains an ally, not a source of problems. Katadyn or LifeStraw are recognized brands in the filtering bottles category.
Lighting to illuminate your bivouacs
The headlamp is another essential accessory. Whether to start a hike before dawn, prepare a meal at the bivouac, or simply find your belongings in the tent once night falls, a headlamp is an indispensable accessory. Practical and lightweight, it guarantees you total freedom of movement while ensuring good visibility. For standard use while bivouacking, a power of between 100 and 150 lumens is generally sufficient. If you plan to hike at night, prefer a model offering between 200 and 300 lumens for more effective lighting. But power is not everything: autonomy is also an essential criterion. At equal light intensity, it is better to opt for a lamp whose battery or batteries offer a longer usage duration, to avoid unpleasant surprises in the wild.
Hygiene and care
Prepare a first aid kit suitable for bivouacking
Just like an injury, an insect bite, a tick bite, or a scrape cannot be predicted. That is why a well-thought-out first aid kit must be an integral part of your bivouac gear. It will allow you to react quickly to a small incident or while waiting for help to arrive, if necessary. To be effective without being too bulky, your kit should contain the essentials: an antiseptic, regular and specific bandages (like Compeed for blisters), elastic adhesive bandages, and sterile compresses. Don’t forget a pair of tweezers, a tick remover, some safety pins, a needle, a small pair of scissors, and adhesive tape. On the medication side, consider bringing an anti-inflammatory like ibuprofen, an antihistamine for allergic reactions, an antibacterial ointment, as well as an Aspivenin in case of a sting. There are ready-made first aid kits. Finally, include a small manual with first aid gestures and emergency numbers to contact based on your bivouac location. Better to prevent than to cure, especially in the wild!
Prepare a hygiene kit for bivouacking
Far from the comforts of home, hygiene and health should not be neglected while bivouacking. To stay clean, fit, and avoid small troubles, certain accessories are essential. A compact toiletry kit containing biodegradable travel soap, a toothbrush, and a microfiber towel: lightweight, quick-drying, and compact: forms the basis. Also remember to bring sunscreen and an insect repellent, especially in summer or in humid areas. For natural needs, a roll of toilet paper (biodegradable preferably) and a trash bag to take everything back with you are essential, in respect of nature. A clothesline can be useful for drying clothes or towels. On the safety side, your first aid kit should include essential medical supplies, not forgetting a tick remover and waterproof bags to protect everything from moisture. With a minimum of organization, you can ensure comfort, cleanliness, and serenity, even in the great outdoors.
Clothing to prepare for bivouacking
On the clothing side, opt for technical, breathable, and insulating materials. A lightweight down jacket or fleece is recommended for the evening, as well as a waterproof windbreaker. Even in summer, nights can be cool: bring a hat and a pair of gloves, just in case.
Other useful personal accessories for bivouacking
Beyond the basic gear, some personal accessories can greatly enhance your experience in the great outdoors. Bringing a camera or a pair of binoculars allows you to appreciate wildlife, flora, and landscapes from another angle, and to keep beautiful memories of your adventures. For navigation, a compass and IGN maps remain reliable allies, especially as a complement or in case of GPS failure. A mobile phone, although often limited in isolated areas, can still be useful for emergencies, especially if paired with a solar charger or an external battery. Finally, hiking poles, often underestimated, provide real walking comfort, especially on rough terrain or during long distances with a loaded pack. Choosing these accessories carefully optimizes both your autonomy, your safety, and your enjoyment during each outing.
.png)
TIPS FOR A SUCCESSFUL NIGHT IN THE GREAT OUTDOORS
Need inspiration: What are the most beautiful trekking routes to do in France?
.png)